pfSense Updating Issues
on Nov. 12, 2025, 2:20 a.m.Recently, I had an old firewall that kept getting certificate errors when I tried to update. Here's how I fixed it.
certctl rehashpkg-static update pkg-static install -fy pkg pfSense-repo pfSense-upgrade
Magic Mirror Project
on April 1, 2025, 2:14 p.m.After seeing this guy's magic mirror, I decided to make my own. There are a few things I did differently. First, I did not use php; strictly css, html, and jquery. Next, I did not spend $100 on a one-way piece of mirror glass. Instead. I bought a sheet of lexan and some one-way self adhesive film. Next, I bought a raspberry pi with most of the stuff I needed. I also bought a 1" by 4" and some molding. There's still some stuff left to be done like sanding, wood-filler(i'm a crap carpenter), and …
...
rtl_433 senors
on Nov. 18, 2023, 8:09 p.m.So a while back, I purchased this driveway sensor kit from Amazon. After a while, I got tired of the beeps nor could you really tell WHICH sensor was going off; however, each sensor has a different channel. Being the techy I am, I wanted to dig further and figure out if I could intercept the sensor signal, and have it send me text messages when the sensor was triggered.
Since these devices operate over the 433mhz band, I figured it would be easy. So I fired up rtl_433 and started listening, b…
...
Cheap Rubber Ducky Digispark Attiny85
on Aug. 26, 2023, 1:49 a.m.This install guide assumes you are running Ubuntu 22.04 on bare metal.
First, we have to install some prerequisites:
sudo apt install libusb-dev arduino arduino-core arduino-mk
Next, setup the user account to allow the dailout:
sudo chmod a+rw /dev/ttyACM0sudo usermod -a -G dialout $USER
Next, disable brltty to keep it from interfering:
sudo systemctl stop brltty-udev.servicesudo systemctl mask brltty-udev.servicesudo systemctl stop brltty.servicesudo systemctl disable brltty.service
Ne…
...
Install Unifi on Raspbery Pi Ubuntu 20.04
on Aug. 22, 2023, 1:17 a.m.install assumes your are running ubuntu 20.04 LTS on a RPi 4 model Bsudo apt install openjdk-8-jdk ca-certificates apt-transport-https gnupg binutils-common libbinutils binutils-aarch64-linux-gnu binutils
verify it's 1.8.0_*java -versionjavac -version
hold java versionsudo apt-mark hold openjdk-8-jdk
setup mongodb repowget -qO - https://www.mongodb.org/static/pgp/server-3.4.asc | sudo gpg -o /etc/apt/trusted.gpg.d/mongodb-server-3.4.gpg --dearmorecho "deb https://repo.mongodb.org/apt/ubuntu …
...
AWS EC2 Install SSM Agent
on May 22, 2023, 7:05 p.m.For Ubuntu, I run the following commands:
sudo systemctl enable snapdsudo systemctl start snapdsudo snap install amazon-ssm-agent --classicsudo snap list amazon-ssm-agentsudo snap start amazon-ssm-agentsudo snap services amazon-ssm-agent
On the rare occasion, you have to add in the private AWS routes for the agent to check in. make sure to add your gateway IP
route -p add 169.254.169.254 MASK 255.255.255.255 gw_ip_hereroute -p add 169.254.169.250 MASK 255.255.255.255 gw_ip_hereroute -p add 1…
...
Create Mac OS ISO
on March 17, 2023, 3:42 p.m.Supposedly, the following command to create the DMG is supposed to be the same thing as doing it from the GUI, but I get errors about erasing the DMG later in the process when I do. So create it via the GUI if you get an error.sudo hdiutil create -o ~/Desktop/Ventura -size 16000m -volname Ventura -layout SPUD -fs 'Case-sensitive Journaled HFS+'
Mount the DMG file. Assumes the DMG is on the Desktop and named Venturahdiutil attach ~/Desktop/Ventura.dmg -noverify -mountpoint /Volumes/Ventura
Cop…
...
Sysprep VMs for Cloning
on Feb. 22, 2023, 4:02 p.m.Need this command to reset all the SID should you clone and need to join a machine to AD.
C:\Windows\system32\sysprep\sysprep.exe /generalize /shutdown /oobe
vCenter Root Password Reset
on Feb. 17, 2023, 3:32 p.m.1. Take a snapshot or backup of the vCenter Server Appliance before proceeding.
2. Reboot the vCenter Server Appliance.
3. After the VCSA Photon OS starts, press the e key to enter the GNU GRUB Edit Menu. Locate the line that begins with the word Linux. Append these entries to the end of the line:rw init=/bin/bash
4. Press F10 to continue booting.
5. Run the commands mount -o remount,rw / passwdumount /reboot -f
6. Confirm that you can access the vCenter Server Appliance using the new root passwo…
...
Enable Serial Console for KVM
on Jan. 20, 2023, 6:49 p.m.Run the following commands on the VM:sudo systemctl enable [email protected]sudo systemctl start [email protected]
Once you do that, then you can run the following command to console to the VM from the host:virsh console vm-name
Coding Test Stuff
on Oct. 4, 2022, 7:35 p.m.fibonacci series - a series of numbers in which each number is a the sum of the two preceding numbers.
fibo = [0,1]
_ = [fibo.append(fibo[-2]+fibo[-1]) for i in range(5)]
print(fibo)
Check palindrome of string a palindrome is a number or string that looks the when it gets reversed
text = 'level'
ispalindrome = text == text[::-1]
print(ispalindrome)
Transpose of a matrix
a = [
[1,2,3],
[4,5,6],
[7,8,9]
]
transpose = [list(i) for i in zip(*a)]
print(transpose)
Type casing a list
list(map(int, […
...
Fix Graylog Corruption
on Sept. 13, 2022, 3:10 p.m.On occasions due to power outages and such, I have issues with an index getting corrupt. So here's how I fix it.
First, confirm cluster is unhealthycurl -X GET "localhost:9200/_cluster/health"
Second, find out what index is the issuecurl -X GET localhost:9200/_cluster/allocation/explain?pretty
Third, delete that indexcurl -X DELETE 'localhost:9200/graylog_29/'
Finally, create a blank index to fix issues in the GUI about it not being therecurl -X PUT "localhost:9200/graylog_29" -H 'Content-T…
...
Resize LVM Volume
on Aug. 10, 2022, 8:09 p.m.First, add the new disk to a physical volume. This assumes the new disk is /dev/sdbpvcreate /dev/sdb
Next, we do this to get the volume group need the logical volume is a part ofvgdisplaylvdisplay
Next, we extend the volume groupvgextend ubuntu-vg /dev/sdb
Next, we need to extend the logical volumelvextend -l+100%FREE /dev/ubuntu-vg/ubuntu-lv
Finally, we resize the partitionresize2fs /dev/mapper/ubuntu--vg-ubuntu--lv
To check to see if the space is there, we run the df commanddf -h
...
Recognize New Disk without Reboot
on Aug. 10, 2022, 3:26 p.m.for host in /sys/class/scsi_host/*; do echo "- - -" | sudo tee $host/scan; ls /dev/sd* ; done
Install Arch Linux with LVM
on Dec. 31, 2021, 2:34 a.m.The first step I check when I boot to the DVD is to make sure I have an IP from DHCPip addr
Next, for me, I setup keyboard layoutloadkeys us
Next, I check to see if arch is booted into EFI models /sys/firmware/efi/efivars
Next, I check the link and then ping a site to make sure DNS is workingip linkping archlinux.org
Next, I setup NTP. I typically point to my firewall since it's a my NTP serverpacman -Sy ntpntpdate 10.0.0.1timedatectl set-ntp true
Next, I make sure the system can see my disk and the…
...
Simplify3D - Stop to change filament
on Oct. 23, 2021, 2:25 a.m.If you ever need to add the gcode to stop at a layer and change the filament, this is it.
{REPLACE "; layer 1," "G1 X0 Y0\nM0\n; layer 1,"}
FF DNS Cache
on Oct. 12, 2021, 2:56 p.m.In Firefox, the browser itself maintains a cache which is here:about:networking#dns
So if you having site issues, clear this. Also, you can see what IP a site resolves too.
pfSense Syslog DNS
on Oct. 12, 2021, 2:47 p.m.I never can remember where and what config to add to unbound to syslog the requests. So now that I have pfblockerng installed, and unbound configured, I have to add this line to the /services_unbound.php config page.
server:log-queries: yes
also, if you need to setup syslogging in general, go to /status_logs_settings.php and scroll to the bottom.
Unifi AP Reset
on Oct. 12, 2021, 1:50 a.m.On occasion, I seem to have to move Unifi controllers or reconfigure APs altogether. So here's how I've done it since they always have issues with provisioning and adoption.
syswrapper.sh restore-defaultsudo set-inform http://10.0.0.2:8080/inform
default password to ssh is:ubnt/ubnt
also, disable IPv6 on the controller so STUN doesn't have issues. Add the following:
nano /etc/sysctl.conf
...
net.ipv6.conf.all.disable_ipv6 = 1
net.ipv6.conf.default.disable_ipv6 = 1
net.ipv6.conf.lo.disable_ipv6 =…
...
CMIYC 2021 Champs!!
on Oct. 2, 2021, 1:35 a.m.Travco is a better word-smith that I. So the majority of this post will be a copy/paste from this original link here. At the end, I want to get into the breakdown of these lists that lanix13 and I have.
We had five members on team Crevasse - zach.sanchez113, Travco, PinkieMcBluey, paymentrequired402, and lanix13. We had debated categorizing ourselves as Pro team (we did have information security professionals on the team), but considering some of our shortcomings we had doubts on if it made s…
...
Blacklist Archlinux Kernel Modules
on Sept. 7, 2021, 5:21 p.m.I have an older sandy bridge PC kicking, but with age comes more maintenance. So on occasion, you have to blacklist newer modules that cause instability.
For example, EDAC modules don't like my rig. So we do this:
nano /etc/modprobe.d/edac-blacklist.conf
...
blacklist i82975x_edac
blacklist amd64_edac_mod
blacklist skx_edac
blacklist e752x_edac
blacklist i5400_edac
blacklist i3200_edac
blacklist i5000_edac
blacklist ie31200_edac
blacklist edac_mce_amd
blacklist i3000_edac
blacklist sb_edac
blacklist pnd2_e…
...
Resize Ubuntu VM after Automated Deployment
on Sept. 25, 2020, 7:30 p.m.Another command I can never remember is these two to resize my VMs after I deploy them from a template.lvextend -l 100%FREE /dev/mapper/ubuntu--vg-ubuntu--lvresize2fs /dev/mapper/ubuntu--vg-ubuntu--lv
VMware VCA Upgrades
on Sept. 25, 2020, 6:40 p.m.Since I always seem to forget these commands, I'm putting them here:# https://vcenter:5480/#/ui/update/availableUpdates#To stage the ISO:software-packages stage --iso
#To see the staged content:software-packages list --staged
#To install the staged rpms:software-packages install --staged
Sort -u Large Files
on Jan. 31, 2019, 8:06 p.m.I know this is a huge issue the world is dying to know how to solve. So why not write about it here. Recently, I have acquired several large text files that have... words in them. Here-in lies the problem. For this to be usable, I have to get it down to a single text file with only a set of unique... words. So, after many failed attempts, I found a solution. First, you have the split the large file out into smaller text files using the hashcat utils. Within these utils is a command called split…
...
Kali Linux Installing Powershell Core
on June 29, 2017, 11:13 p.m.sudo apt-get install libunwind8wget http://security.ubuntu.com/ubuntu/pool/main/i/icu/libicu55_55.1-7ubuntu0.2_amd64.debsudo dpkg- i libicu55_55.1-7ubuntu0.2_amd64.debwget http://security.debian.org/debian-security/pool/updates/main/o/openssl/libssl1.0.0_1.0.1t-1+deb8u6_amd64.debsudo dpkg -i libssl1.0.0_1.0.1t-1+deb8u6_amd64.debwget https://github.com/PowerShell/PowerShell/releases/download/v6.0.0-beta.3/powershell_6.0.0-beta.3-1ubuntu1.16.04.1_amd64.debsudo dpkg -i powershell_6.0.0-beta.3-1ubu…
...
Installing PIP on Cygwin
on Nov. 15, 2016, 6:28 p.m.pip3 Installation, Please
To install pip3, the Python 3-specific version of pip, under Cygwin:
$ python3 -m ensurepip
This assumes the python3 Cygwin package to have been installed, of course.
pip2 Installation, Please
To install both pip and pip2, the Python 2-specific versions of pip, under Cygwin:
$ python -m ensurepip
This assumes the python Cygwin package to have been installed, of course.
Weather Station Project
on Sept. 8, 2016, 2:52 a.m.I was surfing Amazon one day and saw this weather station kit that was based on arduino. There is also a temperture sensor and humidity sensor as well. The problem with kit is it did not allow for the raspberry pi that runs the kit to be put outdoors with the systems. So I built my own case and stand for the station.
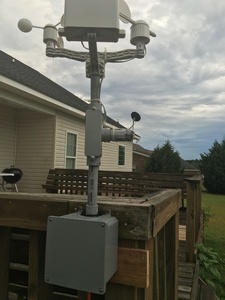
The finished and mounted weather station.
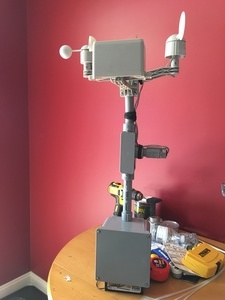
This was the complete test fit of all the pieces.
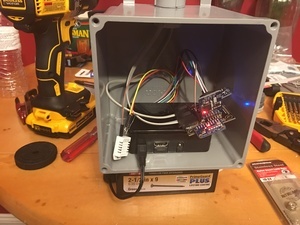
This was the final component testing before I closed up the unit.
...
Installing Masscan
on Jan. 12, 2016, 6:22 p.m.# Centossudo yum groupinstall -y "Development Tools"sudo yum install -y libpcap libpcap-develgit clone [email protected]:robertdavidgraham/masscan.gitcd masscanmake sudo make install# Ubuntusudo apt-get -y install git gcc make libpcap-devgit clone https://github.com/robertdavidgraham/masscancd masscan/makesudo make install
...
Logitech c920 Installation
on Oct. 12, 2015, 11:20 p.m.For some reason, out of the box the Logitech c920 has choppy video but to fix that on Ubuntu 15.04, run the following:
sudo apt-get install dov4l dv4l libv4l-0 libv4l-dev libv4lconvert0 libvideo-capture-v4l-perl qv4l2 v4l-conf v4l-utils v4l2loopback-dkms v4l2loopback-source v4l2ucp
Disable ICMP Redirects
on Aug. 6, 2015, 9:05 p.m.echo 'net.ipv4.conf.all.send_redirects=0' >> /etc/sysctl.confecho 'net.ipv4.conf.all.secure_redirects=0' >> /etc/sysctl.confecho 'net.ipv4.conf.all.accept_redirects=0' >> /etc/sysctl.confecho 'net.ipv6.conf.all.accept_redirects=0' >> /etc/sysctl.confsysctl -p
Centos 7 GlusterFS Setup
on June 30, 2015, 10:10 p.m.A little about the setup before I begin with the actual setup. I created 3 Centos 7 servers with 1 20gb hard disk and 1 200gb hard disk. Since these 3 machines are virtual, it just seemed easier to do this to keep the data separate from the OS disk. Then I installed Centos and set a static IP for each. The following set of commands needs to be run on all 3 servers.
Install the gluster repo:curl http://download.gluster.org/pub/gluster/glusterfs/LATEST/CentOS/glusterfs-epel.repo -o /etc/yum.repo…
...
Bastion Host Setup
on April 27, 2015, 8:35 p.m.This setup is assuming you have a default minimal server install of Centos 7. First, update the system:yum -y update
Next, install epel repo:yum install -y epel-release
Next, install fail2ban to stop the script kiddies: yum install -y fail2ban
Next, install the tools to configure selinux:yum install policycoreutils-python
Next, we need to setup the selinux policies to allow fail2ban to write syslogs:vi fail2ban-syslog.te
module fail2ban-syslog 1.0;
require {
type syslogd_var_run_t;
type fail2ban_t;
clas…
...
FreeIPA Client Install on Centos 7
on Feb. 12, 2015, 3:47 p.m.First thing to check is that you have your first DNS server pointer to your IPA server
Next, make sure you have your fqdn in your host filevi /etc/hosts
127.0.0.1 localhost localhost.localdomain localhost4 localhost4.localdomain4
::1 localhost localhost.localdomain localhost6 localhost6.localdomain6
192.168.0.5 client.example.com client
Set home directories to be auto createdyum -y install ipa-client pam_mkhomedir.so oddjob-mkhomedirecho "session required pam_mkhomedir.so skel=/et…
...
Freeipa Server Setup on Centos 7
on Feb. 12, 2015, 11:37 a.m.The second part of my homelab redo was to setup a Freeipa server.
First thing to check is that you have your fqdn in your host file
vi /etc/hosts
127.0.0.1 localhost localhost.localdomain localhost4 localhost4.localdomain4
::1 localhost localhost.localdomain localhost6 localhost6.localdomain6
192.168.0.5 ipa.example.com ipa
Install the necessary packagesyum -y install ipa-server bind-dyndb-ldap
Issue this command to start the configuration of IPAipa-server-install --setup-dns
Add t…
...
Centos 7 and KVM
on Feb. 12, 2015, 11:12 a.m.So recently, I have started redoing my homelab in Centos 7. First step was to redo my hypervisor in Centos 7 with KVM.
First, install the necessary packages. yum -y install kvm virt-manager libvirt virt-install qemu-kvm xauth dejavu-lgc-sans-fonts bridge-utils policycoreutils-python
Enable the kernel to do IP forwardingecho "net.ipv4.ip_forward = 1"|sudo tee /etc/sysctl.d/99-ipforward.conf
Apply the new kernel settingssysctl -p /etc/sysctl.d/99-ipforward.conf
Start libvirt and set it to sta…
...
Universal Profile
on Feb. 2, 2015, 7:12 p.m.
# HP-UX
if [ `uname` == HP-UX ]; then
export PS1="$(whoami)@$(hostname):"'$PWD'"$ "
fi# AIX
if [ `uname` == AIX ]; then
export PS1="$(whoami)@$(hostname):"'$PWD'"$ "
fi# Solaris
if [ `uname` == SunOS ]; then
export PS1="$USER@$(hostname):"'$PWD'"$ "
if [ -e /bin/bash ]; then
export SHELL=/usr/bin/bash
export PS1="\u@\h:\w$ "
exec $SHELL
fi
fi# Linux
if [ `uname` == Linux ]; then
export PS1="\u@\h:\w$ "
fi
...
Allowing MTR through your Cisco ASA
on Jan. 6, 2015, 9:33 p.m.Here's how I was able to get the wonderful tool mtr to go through my firewall:
asa-gw(config)# class-map icmp-classasa-gw(config-cmap)# match default-inspection-trafficasa-gw(config-cmap)# exitasa-gw(config)# policy-map icmp_policyasa-gw(config-pmap)# class icmp-classasa-gw(config-pmap-c)# inspect icmpasa-gw(config-pmap-c)# exitasa-gw(config-pmap)# exitasa-gw(config)# service-policy icmp_policy interface outside
...
Java 8u25 Install on Centos 6.6
on Jan. 2, 2015, 11:38 p.m.here's how:
cd /opt/
wget --no-cookies --no-check-certificate --header "Cookie: gpw_e24=http%3A%2F%2Fwww.oracle.com%2F; oraclelicense=accept-securebackup-cookie" "http://download.oracle.com/otn-pub/java/jdk/8u25-b17/jdk-8u25-linux-x64.tar.gz"
tar xzf jdk-8u25-linux-x64.tar.gzalternatives --install /usr/bin/java java /opt/jdk1.8.0_25/bin/java 2alternatives --config javaalternatives --install /usr/bin/jar jar /opt/jdk1.8.0_25/bin/jar 2alternatives --install /usr/bin/javac javac /opt/jdk1.8.0_25/bi…...
Speed Up Youtube Videos
on Nov. 23, 2014, 12:10 a.m.for linux:sudo iptables -A INPUT -s 173.194.55.0/24 -j REJECTsudo iptables -A INPUT -s 206.111.0.0/16 -j REJECT
for mac:sudo ipfw add reject src-ip 173.194.55.0/24 insudo ipfw add reject src-ip 206.111.0.0/16 in
for windows:
netsh advfirewall firewall add rule name="YouTubePerformanceHack" dir=in
action=block remoteip=173.194.55.0/24,206.111.0.0/16 enable=yes
Red Hat Enterprise Linux Reset Root Password
on Nov. 23, 2014, 12:06 a.m.On rhel, this is how you reset the root password. Reboot the server
and at the grub boot menu, press tab. This is then give you the option
to edit the current grub config. Press e then highlight the kernel
line and press e again. Add a space to the end of the line and add
init=/bin/bash
Once that is done, press enter and then press b to boot. The
system will now boot up into a read-only single user bash shell.
Once at the shell, run
mount -o remount,rw /
This will remount the filesystem wit…
...
Solaris Console Escape Sequence
on Nov. 22, 2014, 11:06 p.m.Since I never can remember the escape sequence for the Solaris serial console, I am going to put it here#.
Solaris Profile
on Aug. 31, 2014, 5:06 p.m.Today I have been screwing around with my Solaris box. Now I will admit I prefer Linux to Solaris so I have been making an effort to at least get my bash shell straightened out. To do this, I did the following:
vi /etc/passwd...root:x:0:0:Super-User:/root:/usr/bin/bash...
vi /root/.profile
export PS1="\u@\h:\w # "export TERM=xtermexport SHELL=/usr/bin/bashexec $SHELL
...
NIS and Linux
on July 9, 2014, 10:09 a.m.Remember to set the domainname for nis in /etc/defaultdomain or else ypbind will fail to bind if your machine domain.
echo 'yourdomain' > /etc/defaultdomainchkconfig rpcbind onchkconfig ypbind ondomainname yourdomainservice ypbind startypcat passwd | less
Another Reason to Use Visudo
on Jan. 21, 2014, 9:07 p.m.Today I learned that one REALLY should use visudo. Today a co-worker was on a Solaris box after a while called me over because he could not figure out how this user group had sudo rights when their was no mention of it in /etc/sudoers. After both being stumped for about 10 minutes, I asked if the user id of the user was id 0; negative. I paused then thought "what happens when you run visudo?" Sure enough there it was but it lead to the question of "where the hell was the configuration file for …
...
Measuring Server AMPs
on Dec. 20, 2013, 10:15 p.m.So today I learned how to measure amps on a server. First to do so requires some prep work.
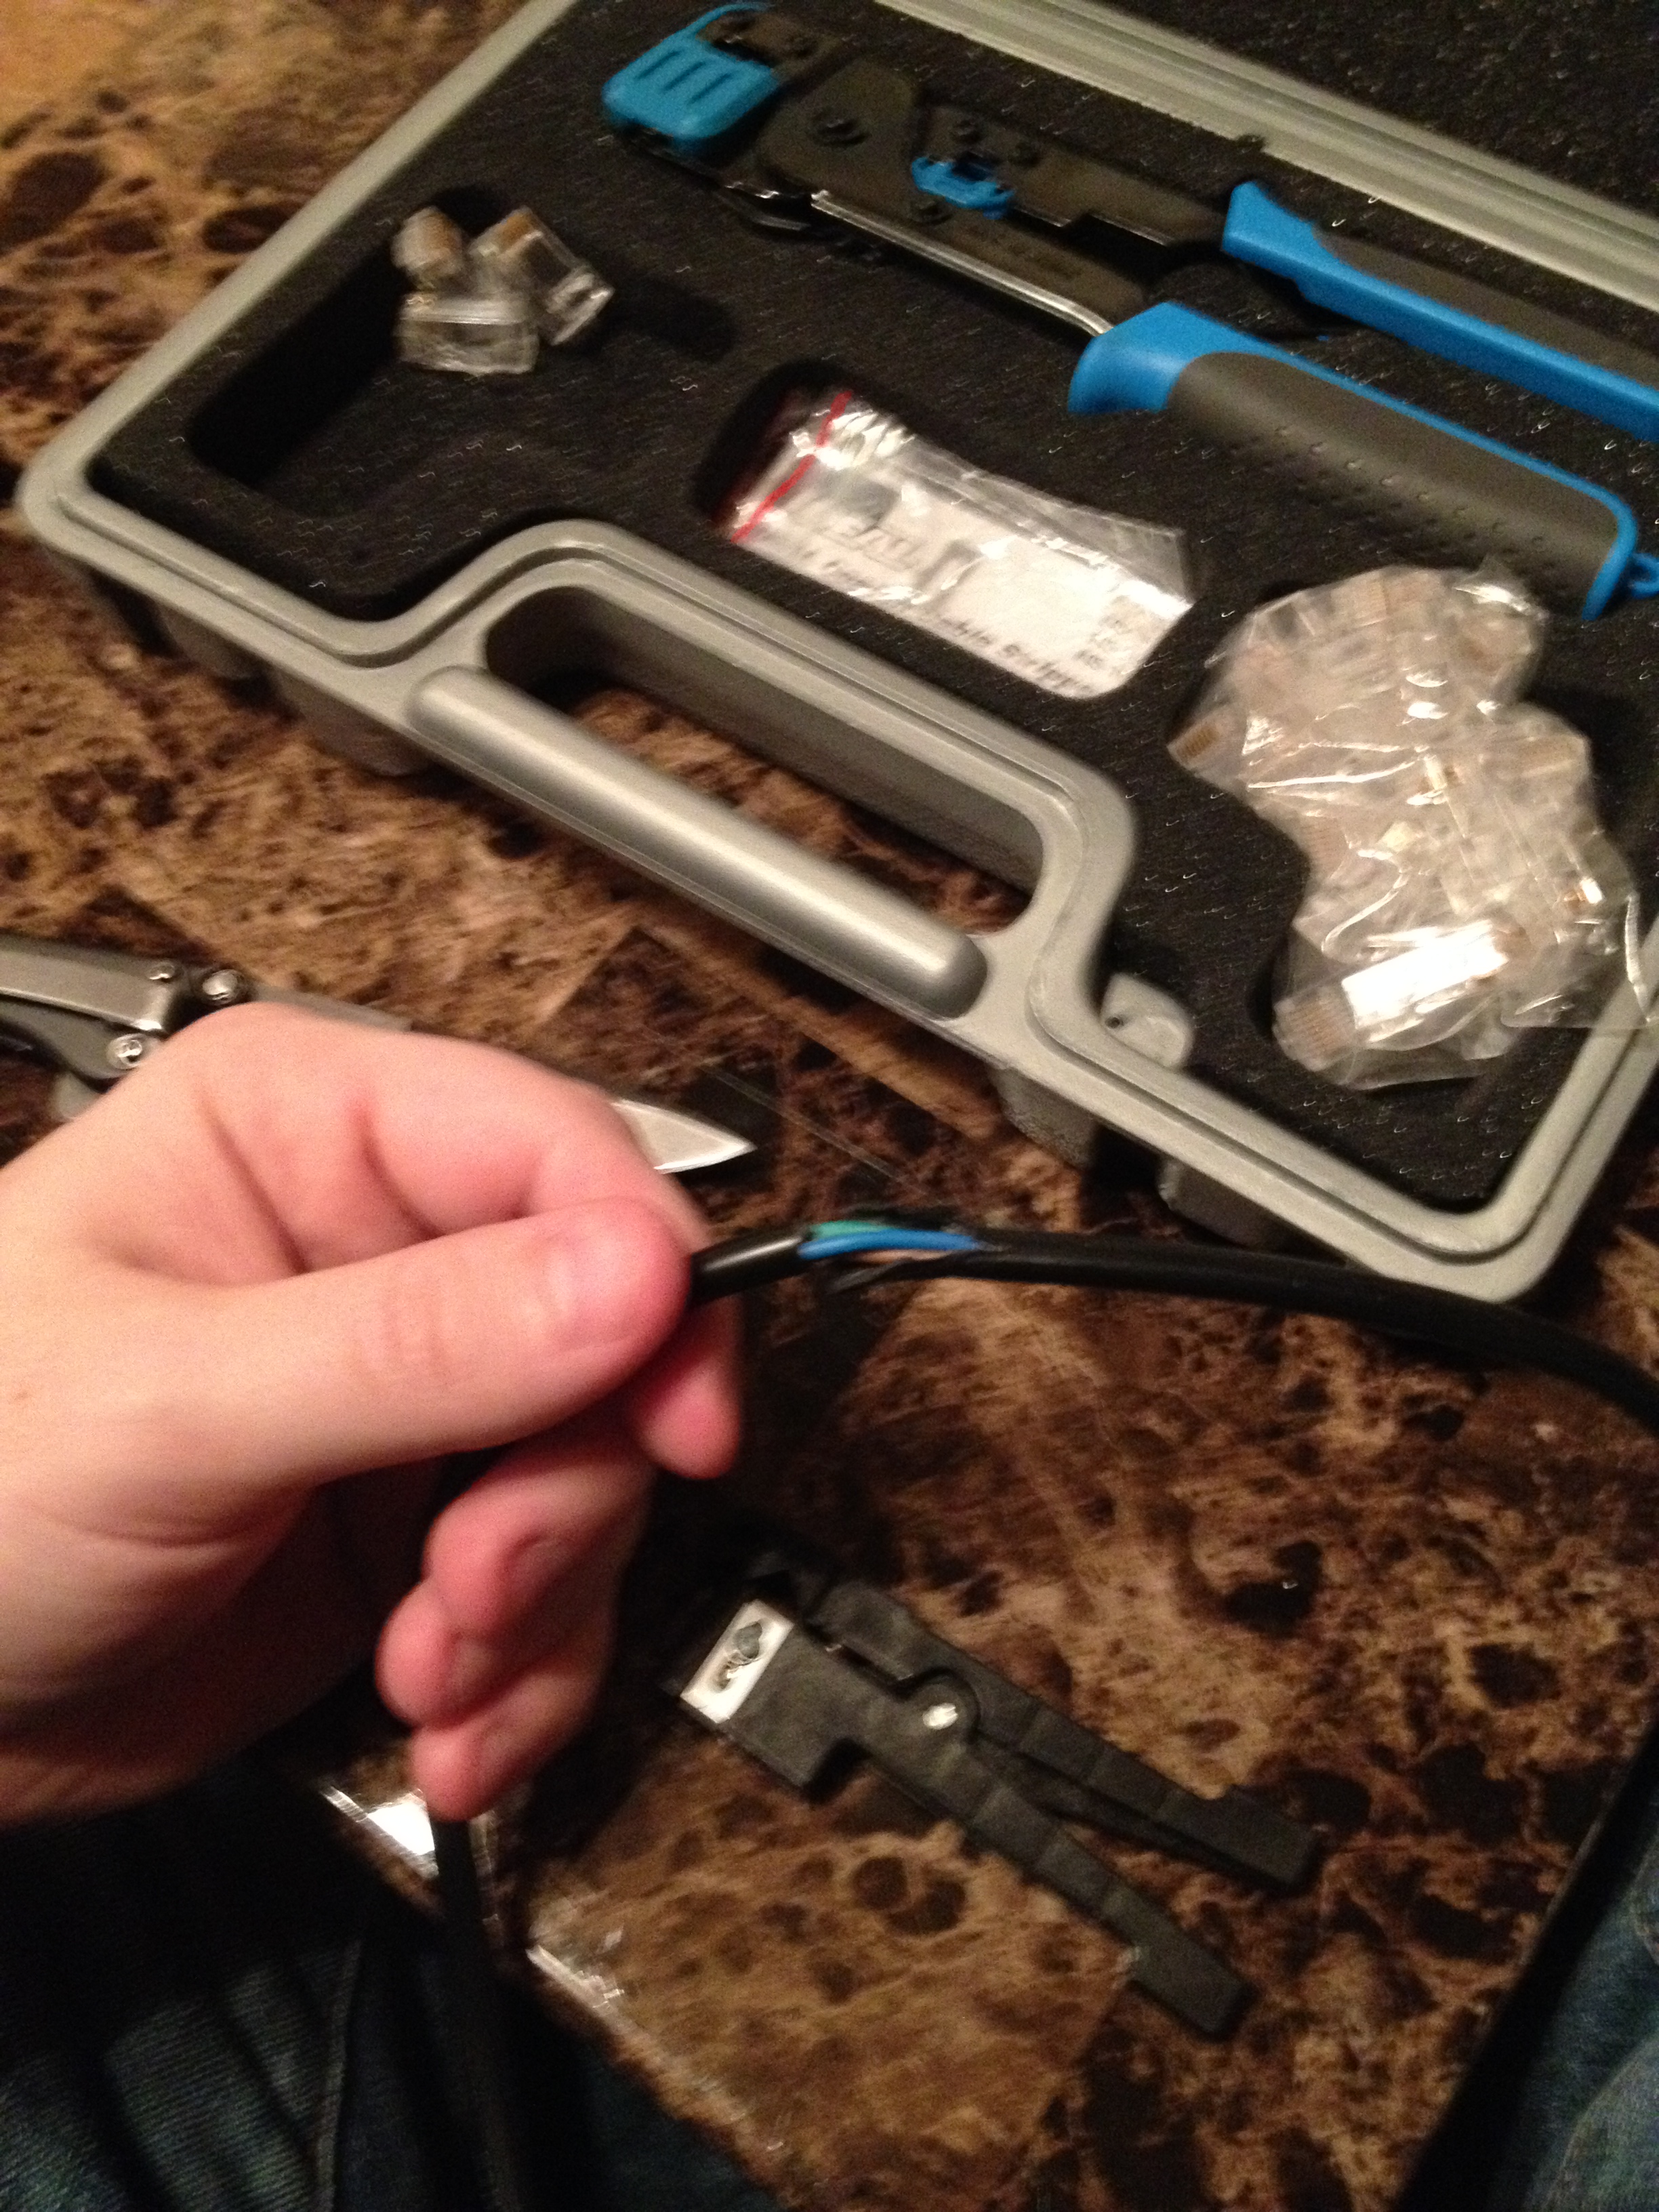
We start by striping the insulation off a power cable since a clamp meter is only designed to be clamped around either the positive or negative wire but not both at the same time.
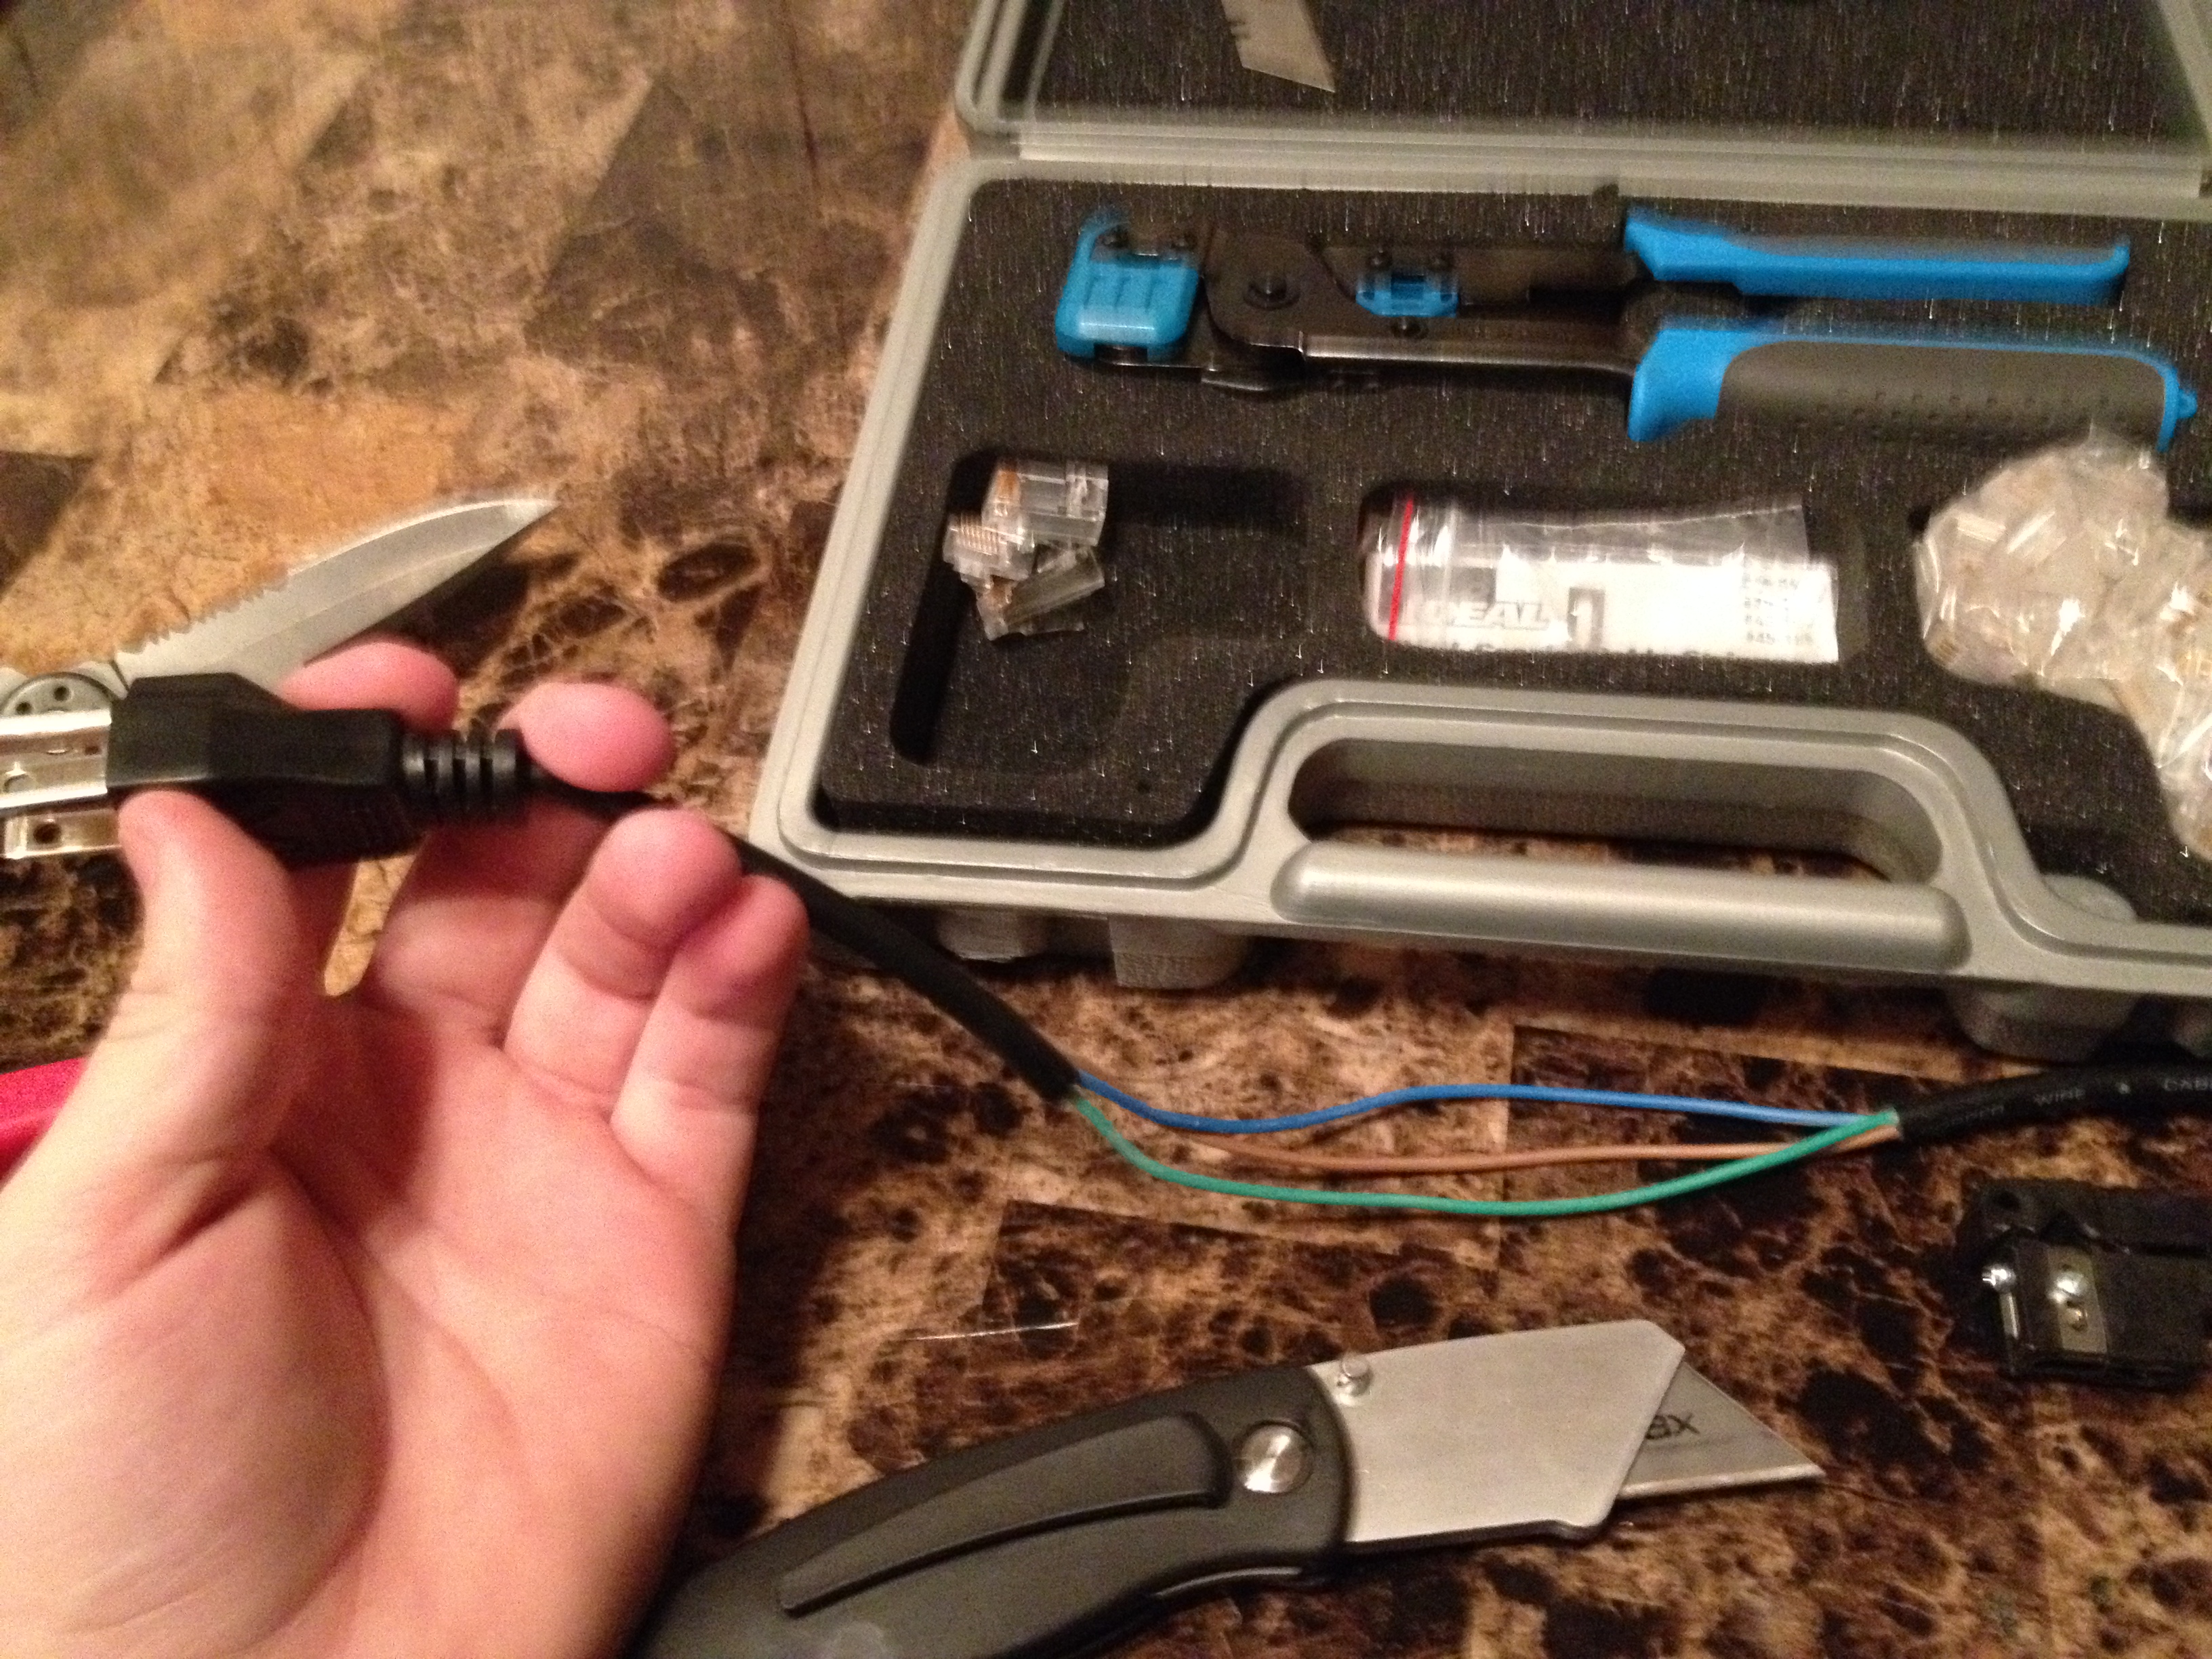
This should be enough. Next let us power up our server and see how many amps 1 side of the twin 1u supermicro server pulls.

1.8 amps? How have I not tripped a breaker?! Oh wait, I have... Next let us power up sid…
...
Reset AIX Account
on Dec. 19, 2013, 1:55 p.m.This is how you reset the failed login count on AIXchsec -f /etc/security/lastlog -a "unsuccessful_login_count=0" -s username
This is how you unlock the accountchuser "account_locked=false" username
Centos: Install package using yum
on Dec. 5, 2013, 10:31 a.m.yum --nogpgcheck localinstall packagename.arch.rpm
Sed - remove commented lines and blank lines
on Nov. 24, 2013, 2:59 p.m.Because i keep forgetting this sweet little one liner, I am putting it here.sed -e 's/#.*$//' -e '/^$/d' inputFile
Disable Selinux
on Nov. 22, 2013, 7:04 p.m.echo 0 > /selinux/enforcesed -i 's/SELINUX=enforcing/SELINUX=disabled/g' /etc/sysconfig/selinux
Fixing Time Zones
on Nov. 21, 2013, 2:25 p.m.This is how to change your system time to the correct time zone on redhat/centosmv /etc/localtime /etc/localtime.oldln -s /usr/share/zoneinfo/America/New_York /etc/localtime
Clearing Password History
on Nov. 19, 2013, 11:05 a.m.Occasionally one has to violate best practice to clear password history... here is how to do it on
AIX, and Linux:chuser histsize=0 username
Sometimes on AIX you have to make sure these lines exist too.
edit this file so that root has a minage and histexpire: vi /etc/security/userminage=0histexpire=0
Solarischmod 600 /etc/security/passhistoryvi /etc/security/passhistory (delete the line for your user here)chmod 400 /etc/security/passhistory
...
VLC and Blurays
on Oct. 21, 2013, 1:35 p.m.Ever decided to no longer use Windows but still wanted to use your blu-ray drive to play your movie? yeah, me too.. heres how to set it up to run with VLC.
Code:sudo add-apt-repository ppa:n-muench/vlcsudo apt-get updatesudo apt-get install vlc libaacs0 libbluray-bdj libbluray1sudo apt-get dist-upgradecd ~/mkdir -p ~/.config/aacs/cd ~/.config/aacs/ && wget http://vlc-bluray.whoknowsmy.name/files/KEYDB.cfg
...
Add User to Sudo Group
on Oct. 4, 2013, 10:42 a.m.Because I keep forgetting how to do this, this is how one adds an existing user to the wheel groupusermod -a -G group user
Ubuntu IPtables Configuration
on Oct. 3, 2013, 11:58 p.m.This is the init.d script that's needed since ubuntu doesn't come with one.
#!/bin/bash
IPT=/sbin/iptables
IPT6=/sbin/ip6tables
IPTR=/sbin/iptables-restore
IPTCONFIG=/root/.config/fw/firewall.conf
PROG=iptables_stop(){
### reset ipv4 iptales ###
echo "Stopping iptables..."
$IPT -F
$IPT -X
$IPT -Z
for table in $( do
$IPT -t $table -F
$IPT -t $table -X
…
...
Selinux, PHP, and HTTPD
on Oct. 1, 2013, 11:07 a.m.A lot of tutorials say to disable selinux. This is dumb. here is how you configure it to let you serve php files.
first make sure it is actually selinuxecho 0 > /selinux/enforce
This disables selinux so now let us see if the pages serve up now.
Next if the pages serve fine with selinux disable, see what the policy is currently set on the directoryls -Z
Also, you can check here to see if it is selinux that is keeping apache from executing the php filestail /var/log/audit/audit.log
Next, we need to…
...
Xubuntu Disable Network Manager
on Sept. 30, 2013, 8:39 p.m.this disables it:sudo touch /etc/default/NetworkManagersudo touch /etc/default/NetworkManagerDispatcherecho "exit" | sudo tee -a /etc/default/NetworkManagerecho "exit" | sudo tee -a /etc/default/NetworkManagerDispatcher
and this re-enables it:sudo rm /etc/default/NetworkManagersudo rm /etc/default/NetworkManagerDispatcher
Development Tools Uninstall
on Sept. 15, 2013, 11:42 a.m.Yes, initially one can do the following but i find it removes things I find useful on my boxes.. like ssh-client and ssh server. yum groupremove "Development Tools"
So that is why I do this; Should work great on x64 systems.
yum erase autoconf.noarch automake.noarch bison.x86_64 byacc.x86_64 cscope.x86_64 ctags.x86_64 cvs.x86_64 diffstat.x86_64 doxygen.x86_64 elfutils.x86_64 flex.x86_64 gcc.x86_64 gcc-c++.x86_64 gcc-gfortran.x86_64 gettext.x86_64 git.x86_64 indent.x86_64 intltool.noarch libtool.…
...
Installing Syslog-ng on Centos 6.4
on Aug. 2, 2013, 2:37 p.m.First you will need to enable the ELEP repowget https://dl.fedoraproject.org/pub/epel/6/x86_64/epel-release-6-8.noarch.rpmrpm -ivh epel-release-6-8.noarch.rpmyum update
next install syslog-ngyum install syslog-ng
next if we are using a mysql backend, we wil have to install the plugin and mysql serveryum install syslog-ng-libdbi mysql-server
Yubikey + SSH key Authenication
on July 22, 2013, 8:31 p.m.So at work we use Yubikeys for various things. So i finally decided to spend the 30 bucks and get one myself for Lastpass and authentication for my servers. While i already have ssh key only authenication setup for most all of my servers, i figured why not for giggles setup up my yubikey as well.
So setting up two factor authentication for ssh isnt as hard as it sounds. I will now walk one through how to do this on Centos 6.4.
First you will need to enable the ELEP repowget https://dl.fedora…
...
Top Replacement: HTop
on July 6, 2013, 10:44 p.m.I also ran across a top replacement todaysudo apt-get install htop
vnStat
on July 6, 2013, 10:38 p.m.Today I came across a cool tool for monitoring network usage in real time as well as historical on a linux called vnStatsudo apt-get install vnstat
and if you want it to output imagessudo apt-get install vnstati
Bind DNS Query Logging
on July 5, 2013, 8:17 p.m.Turn on loggingrndc querylog
View bind sever query logtail -f /var/log/syslog
Turn off loggingrndc querylog
To permanently turn it on, modify the config file
# vi /etc/named.conf
...
options {
querylog yes;
}...
logging {
channel querylog {
file "/var/log/querylog";
severity debug 3;
};
};
List Ubuntu Hardware
on July 4, 2013, 10:28 p.m.Ever needed to find out what hardware a system was running out in more detail that just runningcat /proc/cpuinfo
andcat /proc/meminfo
If so, run the following...lshw
Xubuntu 12.04 Login Fix
on June 13, 2013, 9:37 p.m.Xubuntu 12.04 has a bug which slows down the login process dramatically. Luckily, a fix is available:sudo add-apt-repository ppa:andreas-diesner/lightdm-fix-temporary sudo apt-get updatesudo apt-get upgrade
Fixing My Slow SSH Login
on June 2, 2013, 11:39 a.m.To disable GSS API, first open/etc/ssh/sshd_config in your favorite editor
vi /etc/ssh/sshd_config
Then find the line that says GSSAPIAuthentication yes and change it to GSSAPIAuthentication no
sed -i 's/GSSAPIAuthentication yes/GSSAPIAuthentication no/g' etc/ssh/sshd_config
and save the file. Finally, restart the sshd service.
service sshd restart
Identifying failed drive in FreeNas
on April 24, 2013, 1:54 p.m.[root@n1] ~# zpool status -v
pool: data
state: DEGRADED
status: One or more devices has experienced an error resulting in data corruption. Applications may be affected.
action: Restore the file in question if possible. Otherwise restore the entire pool from backup.
see: http://www.sun.com/msg/ZFS-8000-8A
scrub: none requested
config:NAME STATE READ WRITE CKSUM
data DEGRADED 0 0 18
raidz1 DEGRADED 0 0 50
ada0p2 …
...
Init.d script template
on March 26, 2013, 8:58 p.m.#!/bin/bash
# myapp daemon
# chkconfig: 345 20 80
# description: myapp daemon
# processname: myappDAEMON_PATH="/usr/sbin"
DAEMON=myapp
DAEMONOPTS="-my opts"NAME=myapp
DESC="My daemon description"
PIDFILE=/var/run/$NAME.pid
SCRIPTNAME=/etc/init.d/$NAMEcase "$1" in
start)
printf "%-50s" "Starting $NAME..."
cd $DAEMON_PATH
PID=`$DAEMON $DAEMONOPTS > /dev/null 2>&1 & echo $!`
#echo "Saving PID" $PID " to " $PIDFILE
if [ -z $PID ]; then
printf "%s\n" "Fail"
else
ech…
...
Deleting Files Older Than 5 Days
on Feb. 6, 2013, 10:55 p.m.find /path/to/files* -mtime +5 -exec rm {} \;
xenserver url installs or netinstalls
on Feb. 6, 2013, 10:53 p.m.for xenserver template installs or just netinstalls... use these urls to pull the install.img files
centos: http://mirror.centos.org/centos/6.2/os/i386http://mirror.centos.org/centos/6.3/os/x86_64
ubuntu: http://archive.ubuntu.net/ubuntu/
debian: http://ftp.nl.debian.org/debian/
NIC Renamed eth0 to eth1
on Jan. 29, 2013, 3:58 p.m.Ever had to replace hardware in a linux box and then the networking wanted to screw with you? as in not find your NIC but lspci would list the NIC?
Yeah, this is the file is causing that issue. It records the MAC address of your NIC and then if it changes, it will rename your primary NIC as eth1. Also, if your new NIC name(eth1) isn't in your /etc/network/interfaces, you won't have any networking.
rm -rf /etc/udev/rules.d/*-persistent-net.rules
once you have ran this command, reboot and yo…
...
Ubuntu NIC Bonding
on Jan. 19, 2013, 7:03 p.m.auto bond0
iface bond0 inet static
address 192.168.1.1
netmask 255.255.255.0
gateway 192.168.1.254
dns-nameservers 192.168.1.254
post-up ifenslave bond0 eth0 eth1
pre-down ifenslave -d bond0 eth0 eth1
KVM Centos 6 and Libvirt
on Jan. 19, 2013, 6:58 p.m.To install KVM on Centos 6, we first need to install some things.yum groupinstall Virtualization "Virtualization Client" "Virtualization Platform" "Virtualization Tools"yum -y install bridge-utils avahi ntp ntp-doc ntpdate nano wget
Next, we need to enable the the epel just in case. To do this, we need to download the following rpm's.wget http://dl.fedoraproject.org/pub/epel/6/x86_64/epel-release-6-8.noarch.rpm
Install and prioritize the repo's. rpm -Uvh epel-release-6*.rpm
Now update everyt…
...